Saturday, August 31, 2013
Friday, August 30, 2013
Line Project: zig zag lines: smaller project
For this class the emphasis will be on creating zigzag lines using rope/string/thread on cardboard paper.
Class: 60 minutes
Age: any age
Materials
First let students choose one colour .Have them paint one side of the paper. Dry the paint with a hair dryer.Turn it over and have students choose another colour. Dry it again. Once the cardboard is dry ask students to cut out triangles on the edges of the paper ( not in the centre) . Have them variate it by not cutting out a complete zigzag pattern around the edges. Leave some spaces open.Next let students choose the type of yarn or wool etc. and weave it across in diagonally. The end result will create a zigzag spiderweb type of work. Let them leave some spaces open.Students can draw zigzag lines with a marker in the open spaces.
Class: 60 minutes
Age: any age
Materials
- Rope, yarn , string , thread or wool- various colours
- scissors
- cardboard paper (A4 or B5 size) -
- acrylic paint or tempera paint
- paint brush- primary colours
- palette
First let students choose one colour .Have them paint one side of the paper. Dry the paint with a hair dryer.Turn it over and have students choose another colour. Dry it again. Once the cardboard is dry ask students to cut out triangles on the edges of the paper ( not in the centre) . Have them variate it by not cutting out a complete zigzag pattern around the edges. Leave some spaces open.Next let students choose the type of yarn or wool etc. and weave it across in diagonally. The end result will create a zigzag spiderweb type of work. Let them leave some spaces open.Students can draw zigzag lines with a marker in the open spaces.
 | ||||||||
| use a slightly thick but not too thick variety |
line : zig zag lines a continuation of the first line project
This is a continuation of the line project .If you have started the first project where students use PVC tape and taped straight lines- you can continue or simply start over.
Class time: 60 min
age: 5-9 years
Materials
Discuss the different types of lines students for zig-zag Show different pictures with zig- zag lines. Ask students to identify which lines or zig- zag and which ones are not. For ESL learners you might want to focus on teaching the word "zig- zag" first.Have students work in groups or individually to create zig- zag lines.
Most students kept their line work for the duration of the line project class or until the PVC tape came off.
* Music - you can play musical chairs by asking students to swap and work on each other's projects or simply play music for inspiration.
Class time: 60 min
age: 5-9 years
Materials
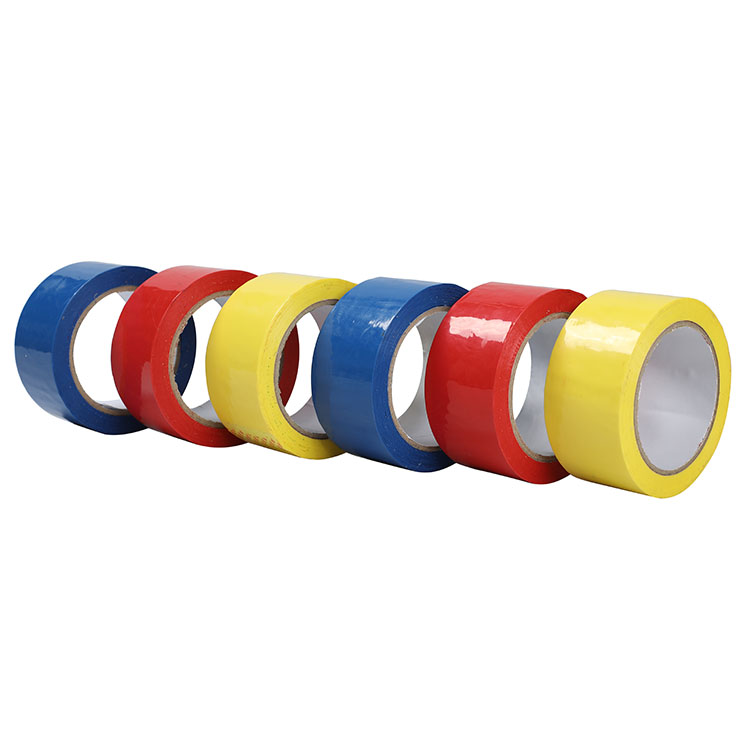
- PVC tape ( different colours)
- scissors
- an area or a space to tape
- music*
Discuss the different types of lines students for zig-zag Show different pictures with zig- zag lines. Ask students to identify which lines or zig- zag and which ones are not. For ESL learners you might want to focus on teaching the word "zig- zag" first.Have students work in groups or individually to create zig- zag lines.
 |
| You can tape two parallel lines and have students tape zig -zag lines within that space. |
 |
| Using PVC tape is more colourful and less stickier than tape. |
 |
| Encourage and guide students to create different variations of zig- zag lines. |
 |
| For early finishers you can let them draw zig- zag lines on the PVC tape. |
 |
| Don't forget to document this work since it's not a permanent creation. |
* Music - you can play musical chairs by asking students to swap and work on each other's projects or simply play music for inspiration.
Monday, August 26, 2013
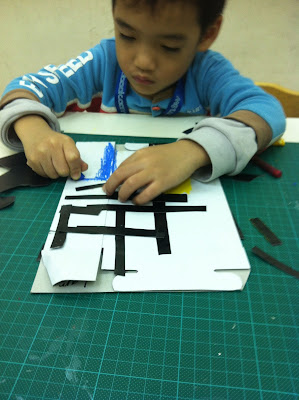
line project : vertical and horizontal lines
A continuation of the line lesson. This is another smaller project. It's fun . Students will create an artwork using vertical and horizontal lines.
Time: 1 60 minute 1 class
age: 5-6 years old.
Material:
paper- ( A2 size)
yarn (wool) or different types of string
glue
glue gun
Procedure:
Warm up teach students about the different art materials in class. Do a warm up. Teach students about yarn, wool- teach them the vocabulary words, yarn , wool, rope, paper, glue ,gun. Show students an example of an art work.Tell the students to create line work ,but it must not curve or curl. They can only create vertical and horizontal lines. The lines may vary in length.
Time: 1 60 minute 1 class
age: 5-6 years old.
Material:
paper- ( A2 size)
yarn (wool) or different types of string
glue
glue gun
 |
| yarn or wool |
Procedure:
Warm up teach students about the different art materials in class. Do a warm up. Teach students about yarn, wool- teach them the vocabulary words, yarn , wool, rope, paper, glue ,gun. Show students an example of an art work.Tell the students to create line work ,but it must not curve or curl. They can only create vertical and horizontal lines. The lines may vary in length.
 |
| some students added pvc tape |
 |
| for early finishers you can let them use pastel to draw lines |
 |
| a finished work |
 |
| a work in progress |
 |
| just getting started |
Monday, August 19, 2013
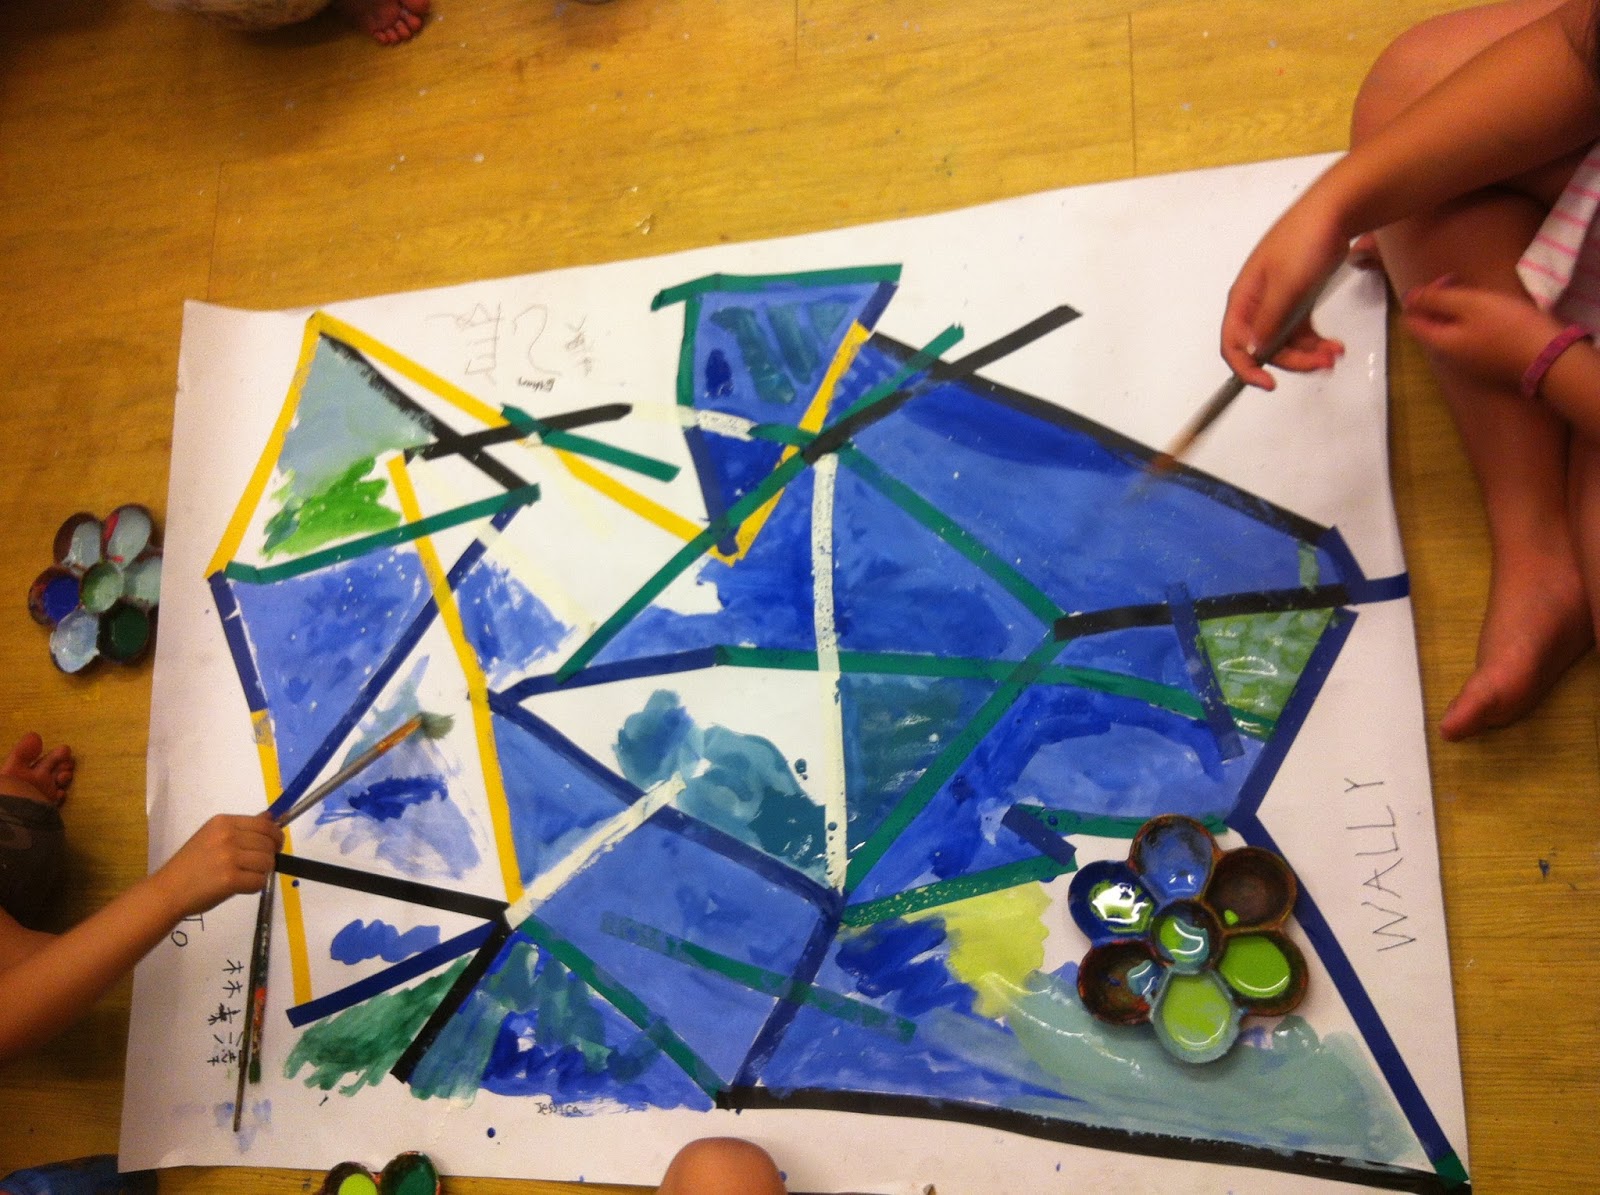
Line Project: A continuation: vertical and horizontal line- smaller project
Vertical and horizontal line-
Time Period 60 minutes
age : 5-9 yrs
firstly review what the students have previously learnt- horizontal and vertical lines
You can teach them about classroom equipment . Download free flashcards from www.havefunteaching.com
Go through that
for this project you can show students an artwork by Dutch artist Piet Mondrian.Make sure to show several different ones.http://www.twitterevolutions.com/bgs/mondrian-twitter-background.jpg
Be sure to show different ones. Ask students to show you where the vertical and horizontal lines are
Materials
A2 or A3 size paper
Three primary colours, red, yellow and blue( it can either be acrylic based paint or pastels
Black oil pastel or black strips of cardboard paper
glue stick ( if students are going to paste black strips)
flat paint brush ( if students are going to paint)
paint tray or palette
 oil pastels blend better than crayons
 acrylic paint
 paint brush
 paint palette

black strips of paper
 Styrofoam cups are great for cleaning paint brushes -just add water
 glue stick
Procedure: ask students to randomly draw vertical or horizontal lines with black pastel or paste the strips on paper . Then ask students to fill in those spaces with three primary colours anywhere they like. Be sure to tell them to colour in only one colour
Variation to lesson- if students are going to use paint - have students draw vertical and horizontal lines with pastel , then let them paint. For first time students show them how to paint with a paint brush and explain to them it is not necessary to add or wet a paint brush too long with water- show an e.g on another piece of paper so students can get the idea of what watery paint looks like.Wait for paint to dry or use a hair dryer. Then asks students to paste their black strips over the drawn black pastel lines.
Chinese New year lanterns-
Time :1-3 lessons depending on age
age: 5-9years
since it was Chinese New year and the lantern festival celebration came up . I decided to incorporate this lesson into a lantern making one.
We used the same materials as above but instead of paper we used cardboard boxes or empty carton boxes. I let the students follow through with the same procedure .
Materials
cereal box
(same materials as above)
glue gun
and
lantern
 any kind of cereal box will do. If it's not white ,paint it white first . Make sure the box is flattened when students draw the vertical and horizontal lines and when they fill in the spaces
.Use a scissors to let students cut out zigzag gaps.
Help students to put the box back together. Make sure to add a handle (use a glue gun).


P.S use recycle materials whenever you can. I collect empty tea cups, or Styrofoam cups ,rinse them out and use them. Whenever you buy something think about whether or not you can re use it in art class-start to build up a collection of recyclable or re usable materials . You could of course ask your students parents- however there will also be some students' parents who forget to bring.If your students are not from Asia you could also teach them story about lantern festival. Since mine are from Taiwan , we didn't focus too much on the lantern festival since most students will have learnt about it at school or other English classes.
For younger kids you can use larger oil pastel sticks especially designed for their fingers.
If you have any left handers in your class-it's a good idea to invest in a pair of scissors designed for left handers too. It may be expensive but well worth the invest , minus a teacher's headache and a happy left hander who can cut.
Time Period 60 minutes
age : 5-9 yrs
firstly review what the students have previously learnt- horizontal and vertical lines
You can teach them about classroom equipment . Download free flashcards from www.havefunteaching.com
Go through that
for this project you can show students an artwork by Dutch artist Piet Mondrian.Make sure to show several different ones.http://www.twitterevolutions.com/bgs/mondrian-twitter-background.jpg
Be sure to show different ones. Ask students to show you where the vertical and horizontal lines are
Materials
A2 or A3 size paper
Three primary colours, red, yellow and blue( it can either be acrylic based paint or pastels
Black oil pastel or black strips of cardboard paper
glue stick ( if students are going to paste black strips)
flat paint brush ( if students are going to paint)
paint tray or palette
oil pastels blend better than crayons acrylic paint paint brush paint paletteblack strips of paper
Styrofoam cups are great for cleaning paint brushes -just add water glue stickProcedure: ask students to randomly draw vertical or horizontal lines with black pastel or paste the strips on paper . Then ask students to fill in those spaces with three primary colours anywhere they like. Be sure to tell them to colour in only one colour
Variation to lesson- if students are going to use paint - have students draw vertical and horizontal lines with pastel , then let them paint. For first time students show them how to paint with a paint brush and explain to them it is not necessary to add or wet a paint brush too long with water- show an e.g on another piece of paper so students can get the idea of what watery paint looks like.Wait for paint to dry or use a hair dryer. Then asks students to paste their black strips over the drawn black pastel lines.
Chinese New year lanterns-
Time :1-3 lessons depending on age
age: 5-9years
since it was Chinese New year and the lantern festival celebration came up . I decided to incorporate this lesson into a lantern making one.
We used the same materials as above but instead of paper we used cardboard boxes or empty carton boxes. I let the students follow through with the same procedure .
Materials
cereal box
(same materials as above)
glue gun
and
lantern
any kind of cereal box will do. If it's not white ,paint it white first . Make sure the box is flattened when students draw the vertical and horizontal lines and when they fill in the spaces.Use a scissors to let students cut out zigzag gaps.
Help students to put the box back together. Make sure to add a handle (use a glue gun).


 . . |
| The lantern light can be bought at a DIY or hardware store |
For younger kids you can use larger oil pastel sticks especially designed for their fingers.
If you have any left handers in your class-it's a good idea to invest in a pair of scissors designed for left handers too. It may be expensive but well worth the invest , minus a teacher's headache and a happy left hander who can cut.
| left hand scissors |
 |
| large oil pastel sticks |
Tuesday, July 30, 2013
First Project line: straight lines/horizontal lines/vertical lines
Lesson 1 -straight lines ( this project can be continued throughout the line module)
Time:60 minutes
age: 5+ years
Aim: Students will learn about line and the different types as well as create a continuous project.
What you will need:
Procedure
To start off this lesson ,show artworks from Hundertwasser and various other artworks that contain line. Discuss the different types of line- horizontal, vertical, wavy , spiral etc.For ESL learners it's important to focus on the vocabulary words and showing them artworks. You can of course role play -show different examples of lines to students and ask them to name it or you can ask them to find different types of line you name from different pictures. You can variate this by asking students to find different types of line in the classroom or space where you teach.
Introduce the materials we will be using for this lesson. Teach the names of each material. You can ask students to recognize different colours if they know any. Talk about safety rules in the classroom and discuss the "Do" and "Don't" s in class.You can let students work in groups or on their own. Once students finish taping an area you can ask them to swap or change it into a game similar to musical chairs - if the music stops , the students must relocate to a different spot.
This is a lesson most students enjoy . After class, document each work by writing their names on the PVC tape with a marker and don't forget to photograph it. With this class we kept the lines on until the end of the line module or until whenever the tape came off by itself.
A variation of this - you can also let students create their own street map
you'll need large sizes of paper ,preferably A0 size
Time:60 minutes
age: 5+ years
Aim: Students will learn about line and the different types as well as create a continuous project.
What you will need:
- PVC tape in many different colours( This tape is easy to use and easy to remove)
- scissors (safety scissors) or a tape dispenser
- A room or space where students can tape their lines
- music
- camera
 |
| PVC tape |
 |
| scissors |
 |
| Tape dispenser |
Procedure
To start off this lesson ,show artworks from Hundertwasser and various other artworks that contain line. Discuss the different types of line- horizontal, vertical, wavy , spiral etc.For ESL learners it's important to focus on the vocabulary words and showing them artworks. You can of course role play -show different examples of lines to students and ask them to name it or you can ask them to find different types of line you name from different pictures. You can variate this by asking students to find different types of line in the classroom or space where you teach.
Introduce the materials we will be using for this lesson. Teach the names of each material. You can ask students to recognize different colours if they know any. Talk about safety rules in the classroom and discuss the "Do" and "Don't" s in class.You can let students work in groups or on their own. Once students finish taping an area you can ask them to swap or change it into a game similar to musical chairs - if the music stops , the students must relocate to a different spot.
 |
| Don't be afraid to let students explore any surface they want to create lines with. |
 |
| Some older students got creative and created a hop scotch zone |
 |
| Another variation of Hop scotch. |
 |
| A rocket. |
 |
| Even walls have lines. |
 |
| If at all possible ,let students explore line on furniture. |
 |
| A unique design on the floor. |
 |
| Don't forget to write the students' names. |
A variation of this - you can also let students create their own street map
you'll need large sizes of paper ,preferably A0 size
 | ||
| have students work in groups and use pvc tape to tape the differen roads |
 |
| when students are done you can ask them to paint between the open spaces |
Monday, July 29, 2013
First project Line
I will teach some of the vocabulary words to students at the start of each class.
To save yourself some time you can download free flashcards from this
website www.Havefunteaching.com.Once you have printed them, you can download them and re use them over and over or use them in your art room.You can also make your own word cards to display around actual art materials /equipment from this website- www.schoolexpress.com
Our first project- Line
This is a continuous project that can span over a month. You can use two 2 hour lessons or 4 one hour lessons. In this project students will learn about the different types of line and focus on each one followed by an art work . The basic theme is still the same but the project or art process can vary. For myself I prefer to change the art process to keep it interesting for me. My firm belief is that if a teacher is interested then the students will be too.
Students will learn about - Straight lines- horizontal, vertical
wavy lines
zigzag lines
You can choose to keep this an on going project , do separate individual projects or do both continuous and individual projects.
First Lesson -straight line- Horizontal and vertical lines
Firstly I teach the vocabulary words for art materials. Spend about 5-10 minutes on that. Role play - ask students to find those objects you show on your flash cards or walk around the room and point out to the various objects in class and ask students to name them. Don't worry if students don't know the names yet. With repetition and practice throughout their time , they will get to know those vocabulary words.
You can of course show students some artworks to using powerpoint presentation and a digital projector. I use free legal software from Google- OpenOffice.org
www.OpenOffice.org
Here are some of the artworks I show Students
 |
| Hundertwasser- 1975 "Blobs Grow in Beloved Garden |
 |
| Hundertwasser - one of his spiral art works |
 |
| An example of horizontal lines |
 |
| An example for vertical lines |
 |
| A photograph showing vertical lines |
 | ||||
| Hundertwasser poster "Save the Seas" for GreenPeace Pacific Southwest | and | the Cousteau Society |
Introduction
I suppose you are wondering how to start off your first art class especially to students whose first language might not be the same as yours? The key to this is to make the student feel as comfortable as possible , speak slowly and clearly, do not use fancy words or jargon they might not understand,hand gestures and motions help a lot and of course use plenty of visual stimuli such as pictures /copies of artworks to help the students. Keep in mind first lessons are never perfect and it'll take time for your students to cultivate a relationship with you.I found that showing students samples of artwork or showing students step by step what to do helps a lot. Students will be able to pick up on the visual cues even though they might not understand what you are saying.Remember to let the students create their own work and remind them that it's important not to copy teacher's sample exactly as is. After all this is art class!
Things you'll need for each class:
To give you an idea take a look at my Facebook page if you have not already.
https://www.Facebook.com/artineng
Things you'll need for each class:
- A smile and positive attitude ( I know this is not always a possibility)
- A camera or simply your phone camera( don't use your nice expensive Nikon or Cannon)
- an apron -paint seems to know when you are wearing nice clothes
- A file /folder to document your lessons so that you can revise or re use them again
To give you an idea take a look at my Facebook page if you have not already.
https://www.Facebook.com/artineng
 |
| Art Demo Day May 2012 |
Tuesday, July 23, 2013
Introduction to Art in English
Hi my name is Leanie. After living in Taiwan for many years, I have decided to start teaching art. I have created artwork since age 4 and completed a B. Tech degree at Tshwane University of Technology in 2003, South Africa.Firstly , I like to teach and I love art. So I thought why not combine the two? After many years of teaching English in the ESL industry I decided to give it a go. I started with a small group of students in May 2012. My aim with this blog is to share any information about art lesson plans specifically ones for students who are secondary language learners or whose first language is not English.Most of the art classes are pretty much the same as you would find anywhere in the world ,with one exception, in addition to learning about art techniques and methods students also acquire a second or sometimes third language. Most of the students here in Taiwan are offered Science and Maths classes with English instruction ,however not much attention is given to the Arts.So I would like to give those students a chance.
Subscribe to:
Comments (Atom)